Jump to content
n4p226r

Pinning a b5 sopmod. Also sopmod vs imod

Recommended Posts

I have an LMT SOPMOD and a B5 Bravo on work guns, and 2 B5 Bravo stocks on personal guns. I prefer them over the VLTOR IMOD.


That being said, I wouldn't not put an IMOD on a gun - They are nice stocks.


As far as pinning, the Bravo is easily, drill through the stock into the receiver extension and pin.


The SOPMOD, I dont know. Looks like it would be difficult.

Share this post


Link to post
Share on other sites

I have drilled through the release pin mechanism, and pinned that with a roll pin. Doesn't mess up the stock visibly, nor does it drill into the RE.

It prevents the mechanism from working, effectively latching the stock in place.

Share this post


Link to post
Share on other sites

Did you drill behind the lever? Have any pictures? Did you remove the spring first?

I haven't taken the sopmod apart but I'm guessing it's similar to the m4 stock.


http://www.brownells.com/.aspx/pid=0/sid=809/schematicsdetail/AR_15_Sliding_Buttstock_Assembly?avad=avant&aid=41227&cm_mmc=affiliate-_-Itwine-_-Avantlink-_-Custom+Link

  • Like 1

Share this post


Link to post
Share on other sites

Oh, and FYI:

https://dsgarms.com/ktb5bravo-blk?utm_source=newsletter&utm_medium=email&utm_content=B5%20Milspec%20Bravo%20Buttstock%20Kit%20-%20Black&utm_campaign=5/6%20Retail%20-%20Armalite%20M15

Kit inlcudes a B5 BRAVO stock in black with milspec buffer tube, buffer spring, standard weight carbine buffer, lock ring and end plate.

B5 Bravo Stock kit for $75 (sign in for full discount).

Share this post


Link to post
Share on other sites

I figured I would update this in case people look in the future.


Remove the internal spring and drill and pin the location in this picture


A77F9C50-3FB5-499A-BEA7-C2AED31399CA_zps


100% invisible when you put the lever back on.


Drill bit is mc-master Carr part number 3146A113


Roll pin is mc-master Carr part number 92373A126

  • Like 1

Share this post


Link to post
Share on other sites

I figured I would update this in case people look in the future.


Remove the internal spring and drill and pin the location in this picture


A77F9C50-3FB5-499A-BEA7-C2AED31399CA_zps


Drill bit is mc-master Carr part number 3146A113


Roll pin is mc-master Carr part number 92373A126

Share this post


Link to post
Share on other sites
On 6/5/2016 at 2:26 PM, n4p226r said:

I figured I would update this in case people look in the future.


Remove the internal spring and drill and pin the location in this picture


A77F9C50-3FB5-499A-BEA7-C2AED31399CA_zps


100% invisible when you put the lever back on.


Drill bit is mc-master Carr part number 3146A113


Roll pin is mc-master Carr part number 92373A126

I’m new to a lot of this, and was wondering if you could help break down what you did to drill through the internal stock pin? With my current knowledge I’d most likely ruin the stock and drill around it, since it’s metal. I know this is years later but I have to give it a shot.

Share this post


Link to post
Share on other sites
On 4/25/2016 at 8:43 AM, Displaced Texan said:

I have drilled through the release pin mechanism, and pinned that with a roll pin. Doesn't mess up the stock visibly, nor does it drill into the RE.

It prevents the mechanism from working, effectively latching the stock in place.

Hello, I’m attempting to pin a SOPMOD myself and I’m having some trouble. Would you be able to share exactly how you would drill through the release pin mechanism? I know the plunger inside is round and if I attempted to drill through as is, I’m assuming the bit would slide off to the side before starting to bite into the pin. Not entirely sure how to end up with the results that the other gentleman had posted before. I know I’m 7 years late to the party but I was hoping you could help me. Thank you.

Share this post


Link to post
Share on other sites

It’s been a long time, and I since moved to Texas where I unpinned all that crap….


That being said, I think I used a small drill to make a hole at the spot I wanted. Made sure to dimple the plunger mechanism inside. 
Then, I removed the plunger, slowly drilled the rest of the way through it. 
Once I put everything back together I tapped a roll pin in.


I’m out of country on vacation at the moment, but when I get back, I can give you a visual of how I did it. 

Share this post


Link to post
Share on other sites
On 5/25/2023 at 12:43 AM, 050417Jl said:

Hello, I’m attempting to pin a SOPMOD myself and I’m having some trouble. Would you be able to share exactly how you would drill through the release pin mechanism? I know the plunger inside is round and if I attempted to drill through as is, I’m assuming the bit would slide off to the side before starting to bite into the pin. Not entirely sure how to end up with the results that the other gentleman had posted before. I know I’m 7 years late to the party but I was hoping you could help me. Thank you.

Hey, sorry I kind of forgot about this. 
 

My stock wasn’t a Sopmod, it’s a Vltor, but I imagine it will be similar. 
 

Here’s where I drilled on mine. I used a 4-40 set screw to prevent the latch from moving. You could use some JB Weld to putty over the screw, or for that matter, you could just leave it be. I believe as long as it’s not readily adjustable without using a tool, you’re gtg. 

60A16B0E-7B26-427C-B614-45477702881F.jpeg

Share this post


Link to post
Share on other sites

Join the conversation

You can post now and register later. If you have an account, sign in now to post with your account.

Guest
Reply to this topic...

×   Pasted as rich text.   Paste as plain text instead

  Only 75 emoji are allowed.

×   Your link has been automatically embedded.   Display as a link instead

×   Your previous content has been restored.   Clear editor

×   You cannot paste images directly. Upload or insert images from URL.

Loading...

  • Recently Browsing   0 members

    No registered users viewing this page.


  • olight.jpg

    Use Promo Code "NJGF10" for 10% Off Regular Items

  • Supporting Vendors

  • Latest Topics

  • Posts

    • The  12-1 compression ratio L88 is long gone. This is GM's updated version. it might be  pump gas 10-1 engine The L88 was a aluminum head  cast iron block engine with a nasty solid lifter cam. the  ZL1 was a all aluminum  12 or 13-1 compression ratio engine with the best forged internal parts at the time and had a even nastier solid lifter cam 
    • I like my regular carry holster.  OWB leather with belt slots.  I've been carrying for over a year and it was comfortable and I hardly even noticed it.  I carry (usually) a Ruger LCP .380 - light, convenient, tiny. But...today I ended up taking it off an leaving it home after a few hours. I cut down a big maple tree a few days ago and I spent 3/4 of today loading and unloading firewood into the back of my truck and a trailer.  It was a warm day, I was dirty, tired, sweaty, and my holster was rubbing against my side.  The leather and exposed metal snap was no longer comfortable. I'm thinking about adding a layer of something to that part of the holster to soften the contact.  Anything insulating will make it worse.  I don't want a sweaty, hotter holster against my skin.  I'm imagining something thin, breathable, that won't absorb sweat, and softer than leather, metal snaps, and rivets.   But I have no idea what would work. I'm hoping somebody else has already figured this out and I can just do what they did. Any suggestions appreciated.
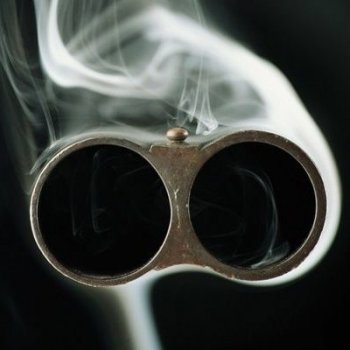
    • Check the primers on the ammo you didn't shoot yet. Are they fully seated? If the primer is not just below flush with the back of the case, the first hit can seat it better then the second hit ignites it. 
    • And, charging your car at home? We've got you covered! California braces for new electric plan: Make more, pay more | Fox Business
    • I'm thinking L88? Or is my memory faulty?
×
×
  • Create New...